Game Meat from Freezer to Hot Canning to Tenderize and for Longevity. Updated

My wife Susan and I have been vacuum freezing game meat for years. In October 2019 we put 300 pounds of Moose and 150 pounds of wild boar in the freezer. In 2021 we learned the hot-canning method used by many hunting families for stews and such in glass Ball Jars. 

If you enjoy eating the game you hunt and like to preserve and tenderize your meat, read on.

We processed and vacuum sealed all the meat at home. 

In 2019, we expected large summer 2020 BBQ gatherings, so we made burger patties and put large numbers of patties in vac bags.

And as we all know, COVID changes our lives forever. We still had lots of frozen moose burger and stew meat. What to do?


Part of my reason to continue to hot can was that my stew meat came out-of-the-jar so tender that I could cut it with a fork. And it cuts down mealtime prep. to minutes.   Wow!

For stews, I then cooked/steamed or quickly pressure cooked fresh carrots, potato, onion, celery etc., then added the hot canned stew meat. I used the juices to make a flour gravy adding herbs, salt and pepper. Sooo Delicious! Yes you can “can” your veggies too. 

This month, October 2022, I booked another Newfoundland Moose hunt as part of my bucket list. What to do with another 300 pounds of moose meat?  I still had 20 or so pounds of that frozen moose burger I wrote about at the beginning of this article?

I decided to hot-can the frozen game burger too, like all those patties we froze plus all the burger intended for pasta sauces. The frozen burger would have be ok for longer freezer storage but the meat became so buried in the freezer making it very hard to find.

Accordingly, I gathered all the frozen moose burger, about 20 pounds and hot canned it for use in my delicious pasta sauces, “shepherds pie”, chili recipes, biscuits and gravy, meat pies, meat tacos, mince meat pie, and so much more. Hungry yet? I sure am! 

I used a T-fal Pressure Canner below with Pressure Control,  22 Quart volume. But you can use any large canner.  You will need Ball jars and lids. 

There are other brands and styles, but I like this one because it is so easy to use.

T-fal Pressure Canner


I  thawed the moose in large pots meat of cold water. Here is a basic recipe video.

I highly recommend purchasing a canning book like this one below, to become educated for safety and have delicious recipes.

The Complete Guide to Pressure Canning: Everything You Need to Know to Can Meats, Vegetables, Meals in a Jar, and More

In the past year 2021, I successfully hot canned venison, wild boar, chicken breast, moose and now moose burger. 


After canning, you can label like this above with Avery labels.

Enjoy!


Why Hot Pressure Can Game Meat and Other Meats?

Especially in days of inflation, this is a great way to get the most out of your meat pantry and use your creative talents. You can do it!

I have had vacuum sealed game meat in my freezer most of my life. In the winter, one of my favorite meals is venison or moose stew and chicken or venison noodle soup. 

I had avoided hot pressure canning meat thinking that vacuum sealing -freezing was the best and easiest option of preservation. Well, it is many times, for back straps and tenderloin for grilling and some loin steaks and burger.

But there are larger amounts of tougher cuts that are best pressure cooked to tenderize. Doing it in advance creates an opportunity to do large amounts of tenderizing meat prep.

Today, I am using a T-fal Pressure Canner with Pressure Control, 3 PSI Settings, 22 Quart volume. You can buy this on line for $130 dollars.  You will need Ball jars and lids. 

There are other brands and styles, but I like this one because it is so easy to use.


T-fal add, on Amazon says “About this item” Below

  • 22 quart polished aluminum stovetop canner and pressure cooker with a deluxe pressure gauge dial
  • Selective pressure control with 3 cooking pressure options: 5, 10 or 15 PSI; overpressure steam release safety components
  • Heavy gauge, rustproof aluminum construction; sure locking lid system; pressure monitoring device built into handle
  • Includes 2 canning racks to hold 16 pint size jars or 26 half pint size jars when double stacked or 7 quart size jars

I did use this hot canning method largely because the meat is ready to eat and tender, right out of the jar saving lots of time and cleanup energy! 

How difficult was it?

Venison Stew – Just heat and add a butter rue

Mouthwatering tender Venison in broth for soups or stew


It was so easy that I began to pressure can chicken breast when it was on sale and also to pressure can stews as well. The chicken is so versatile, chicken salad, chicken soup, chicken pot pie. Wow! 

tender chicken chunks ready for soup, salad, pot pie or stew. Buy it on sale!

My secret ingredient is to use a high quality powdered chicken and beef herb bullion to make the liquid filler. I would make as many cups of stock with the bullion as I  needed to fill the jars.  The bullion adds salt and herb flavor. I made it like I’d  make a cup of beef or chicken soup to taste. My thinking is for fast, easy and delish. You too!

I can make a delicious stew in half the time, say 30 minutes. Most of that time is cutting veggies like carrot, potato, celery, onion, garlic etc. The remaining time 8 minutes is to pressure cook the veggies with herbs with or without the meat in it and make a rue with butter and flour. Salt and pepper to taste.

Further, I can make a hearty venison or chicken soup or pot pie, adding frozen vegetables, peas and carrots, corn and noodles or add a premade pie crust in 15 minutes or so and bake the pie till the crust is just browned. Make a butter rue base gravy. Yum!

The other great thing about pressure canning is that you can do complete meals, make your own hearty beef bone stock, Chicken Stock too. Just  the way you like it. 

Canned meat and stock stores for quite some time (up to 3 years) in a cool dry area. See below.

https://extension.umn.edu/preserving-and-preparing/storing-canned-food

Good Hunting!

©Copyright 2021


Dry Aging Venison in the Fridge – My three day method. Updated with dry age bags.

I knew for years about dry aging but never really needed it till now.  I have lots of vacuum sealed venison in my freezer from deer and moose. Some of the cuts are on the tougher side. I have used the Sous Vide method of using a water bath to cook the internal wild game temperature to medium rare and that works but does not tenderize or change the flavor of my meat.

I am a big fan of the Internet and You Tube to see what others are doing in the kitchen with venison. Personally I like the idea of short dry age times. I tested my theory and it works for me.

I thawed a piece of moose rump steak after much research and placed it on a  non-reactive rack in my fridge and set the actual fridge temp to 38F. Three days later I had meat that was very tender with minimal meat loss. Flavor was excellent and I didn’t trim  much. Now the Sous Vide will do an even better job on a tender, flavorful cut.

Key to aging is getting the actual temperature inside correct.

Aficionado’s, say that 34 to 39 degrees is the window of temperature that is ideal for connective tissue and enzymes in the meat to tenderize yet minimize bacterial growth. I do not have a spare fridge so I experimented in my new large kitchen fridge. I was able to easily set and verify the temperature.

There are many methods and time lengths that one could use, however, I wanted to minimize the loss of meat and almost no meat was cut away using this 3 day method.

Another method I will try is using special dry age freezer bags that allow evaporation in the fridge for larger cuts below.

Update

It took a month to get my dry age vacuum seal bags from Europe. Beginning tonight, 1/8/2021, I will dry age 2 moose steaks and one venison cut of backstrap in those dry age bags for at least 20 days maybe more. See photo below of my vacuum sealed bags that allow air to pass out only. I am dry aging two Moose Rump steaks and one 5 inch cut of Whitetail back strap. It takes three days for the plastic to adhere to the meat says the instructions.  I will follow up this article in 20 days. 


How to Dry Age Venison at Home

If you vacuum seal meat and freeze as I do, then, I am told,  you are Wet Aging your meat and to some degree freezer meat that has been vacuum sealed, improves in flavor (degassing) but does not tenderize or break down the connective tissue.

Hope this article helps you eat all that great wild game and go get some more.

Good Hunting!


Venison Backstrap Jalapeño Poppers – Updated

I like to chef with my venison but it wasn’t till I hunted whitetails in Texas before I tried bacon wrapped Jalapeno poppers. My taste buds went absolutely crazy, when I ate one fresh off the grill or out of the oven. You use 1/2 seeded jalapeno with cream cheese, add a thin slice of  marinated backstrap and wrap it in bacon and roast.  It is not uncommon to stuff your popper with a taste of meat, and tender strips of venison backstrap is perfect. Below, I cooked these with jalepeno peppers, and for my wife I cooked with green bell peppers (no heat). Honestly, the heat in the jalapeno’s with seed removed is very mild and blends well with the saltiness of the bacon, cheese and venison. My wife’s comments were; “I could have these for dinner, they are so good! 

I found this recipe below that ideally does justice to these poppers. I can taste them from here! If the jalapeno seeds are removed there is just a bit of heat but the crispy bacon, venison and  smooth melted cream cheese comes through but be careful as they are addicting as all-get-out!

https://thekatherinechronicles.com/venison-backstrap-jalapeno-poppers/ 

Key to the crispy bacon is to precook some that can still be wrapped around the poppers as the recipe suggests.

Of course you can add meat or not but it is the bacon, a bit of spice from the jalapeno and the melted creaminess of the cream cheese. I recently had some poppers with cream cheese and three cheese Mexican added to the cream cheese. It’s all good! I like a cold beer to chase it!

Bon Appétit my Hunting Friends


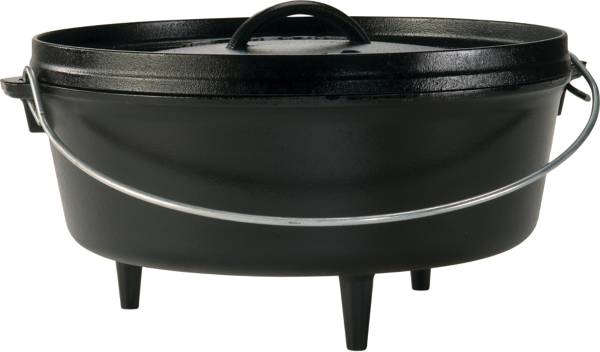
Campfire Peach Cobbler in a Cast Iron Dutch Oven

Camp Dinner was over.  Y’all want some dessert? The Texas hunt camp cook said; “I have some Peach Cobbler cooking in the fire yonder”. “Where?”  We asked as we looked into the fire? We could barely see some metalic pot covered in coals. The cook reached into the fire with a metal hook and pulled the cast iron dutch oven from the fire as if pulling a rabbit out of a hat.

Lodge Cast Iron 6 Qt Dutch Oven product image

Peach Cobbler is a sweet moist cake like mixture with sliced canned peaches and syrup suspended within the cake like mixture. It was so delicious, piping hot from the fire. I was fascinated. I am going back to Texas this year but I can’t wait for my peach cobbler.  I have purchased  a “Camp” dutch oven so coals can be placed both over and under the oven. Today most folks use store bought charcoal to cook with these dutch ovens. Out on the range, chuck wagons used flour, some sugar and canned peaches mixed together. It works fine!

Today some folks use white or yellow cake mix to add instead of flour and sugar but either works fine.

Betty Crocker Super Moist White Cake Mix, 6 Pack, 16.25 ozGold Medal, All Purpose Flour, 2 lb

Every cook has his or her recipe for Peach Cobbler. Many use butter or crisco to grease the oven. Today you can buy aluminum trays to line the oven for easy care. The peaches are added first. A 10 or 12 inch 4 to 6 quart oven can use 2 cans of peaches, followed by flour or cake mix. Next is to fold-in the cake mix with the peaches taking care to be gentle. Some folks add other fruits too such as chunk pineapple. Next is to put dash of cinnamon a few pads of butter on top if you like and close the lid.

LIGHT THE CHARCOAL

Use a chimney starter like the one below to get your coals glowing hot. How many? Say 10 coals for the bottom of the oven and 12 coals for the top.


Kingsford Grilling BB0466 Deluxe Charcoal BBQ Chimney Starter, Grill, Silver

It takes about 45 minutes at around 350 degrees to cook a peach cobbler but it is recommended to rotate the oven a quarter turn every 15 minutes so there are less hot spots. I like to see the top of the cake caramelized a bit. Your the chef so you make the call. Serve with  a scoop of vanilla ice-cream. Wow!

Check out the web for tricks and techniques!


Good Eating Y’all!


Grey Squirrel Meat is Delicious!

In areas that abound in grey squirrels, like southern New Hampshire, you can make a fun and challenging hunt and great tasting meal for 2 to 4 in no time. All you need is a license to hunt, follow the laws in your state and go hunting in squirrel season. Here in New Hampshire it usually starts in September but check with Fish and Game on the internet for licensing and dates.  I hunt them in full camo with a face mask and wait quietly like I was turkey hunting. If they ID your face, they are gone or chatter for hours alerting the world of your presence.

You can hunt squirrel typically with a .22 caliber such as .22 long rifle or a shotgun like a a .410 or 20 gauge. Years ago I used to hunt them with bow and arrow too. I prefer a .22 with a scope. It takes about 3 squirrels to serve 4. You can freeze pieces till you get enough to cook. With your squirrels, gutted, skinned, cleaned, cut with a sharp knife, and meat scissors and inspected for pellets(I separate the legs and cut the torso in half) coat the pieces in flour and brown them in olive oil in a large skillet for 10 minutes or so till four crusts a bit. Then toss them in your pressure cooker for 10 minutes with 1 1/2 cups beef broth , 1/2 cup red wine, 2 bay leaves, 1 tsp thyme, 1/2 tsp salt 1/2 tsp black pepper (fresh ground is best). Or toss them and veggies into a crock-pot in the morning with veggies and cook them all day or till tender.

Squirrel Stew

Now you have very tender squirrel that can be stewed with potato, carrots, celery, onion, and a few minced cloves of garlic. You can southernize it with dumplings too. If the liquid is too thin, you can thicken with a flour/butter roux or use cornstarch ( a tablespoon cornstarch in 1/4 cup water) add slowly to your stew while bubbling to get a gravy like consistency. Salt and pepper to taste. Enjoy! A fresh sliced baguette with butter helps sop up the juice, if you omit the dumplings!

Tacos too!!

Or you can pull the meat off the bones easily if pressure cooked and make fajitas, tacos with your meat sauted in a sauce and use soft shells to add lettuce tomato, onion and salza and sour cream over the meat. Another thought is to freeze the cooked pulled meat and vacuum seal it for later use. I would freeze for a week or two to maintain fresh flavors.

Squirrel Pot Pie!!

If you have enough meat you can make a delicious squirrel pot pie with a pie crust, peas and carrots in a squirrel or beef gravy piping hot. Serve with mashed potato’s.

Enjoy! Good Hunting and Good Eating!

© Copyright 2020.

Bored? Make Some Moose Cabbage Lasagna

I was banging away on my keyboard this morning 4/19 and at the same time watching the news about COVID and how China lied to the world and continues today. Ok don’t get me going! But I was bored!

On my computer, I ran across an interesting delicious foodie immune supporting anti-oxidant ideas for moose dinner for me and Mrs. , but alas, I had to go to the store and get some ingredients in order to be creative. It uses giant size savoy green cabbage leaves.

Wirsingkohl.jpg

Courtesy Wikipedia.

Red Bell Pepper for color, two carrots, Onion, Garlic, (got to have garlic) rice and ground meat, in this case Moose burger, cheese and one egg.

We are making Moose Cabbage Lasagna! It has more anti-oxidants and anti-viral minerals such as Zinc that you can shake a stick at. And it tastes delicious!

You can never go wrong with garlic and tomato sauce either.

Mask on, and undaunted, wiping down my shopping cart to kill the bas..well, the little creepy viruses.  I endeavored to purchase a large green savoy cabbage, the kind with all the visible branches in each leaf. I chose the green savoy cabbage because it has dozens of minerals and anti-oxidant supporting Vitamins like A,B1,2,3,4,5,6, C, K, E, and immune support minerals galore.

I grabbed a pound of Moose burger, a venison that has little fat, so lots of Protein, B12, B6 and selenium, Zinc(anti virus).

Sitting in a house for a month can make you b-ass fat, so good for the great protein with lots of flavor and far less fat and little carbohydrate compared to real lasagna

The Recipe.

Ok blanch 8 to 10  whole green cabbage leaves so they wilt a bit but keep their color. Put aside. Then fry up the pound of venison in a little EVO Oil put aside in a bowl. Also cook a cup or so of rice. I like Basmati rice.

Yes this takes a bit of multi-task monitoring but remember, your bored!

Dice 2 carrots, (watch your fingers the carrots being round are not easy to dice), dice one medium onion, one medium red, yellow or green pepper(your choice) and two cloves of garlic minced. Saute for 5 to 10 minutes in oil add some salt and pepper.

Add the sauted veggies and 12 oz. of cooked rice, 12 oz of tomato sauce, ( I used a  marinara sauce) a half cup grated Parmesan cheese (I had flakes) and 1/2 cup mozzarella grated), a pinch of herbs ( your choice like fresh basil- very aromatic) and a raw egg to the burger to help bind the ingredients. Mix it together.

Now to make the lasagna out of the cabbage leaves. Find an 8 to 10 inch oven proof pan with at least 4 to 6 inch inch sides. We are now going to add a few drops of oil to the pan and spread 2 to 3 large wilted pretty green cabbage leaves on the bottom. Now add a thin layer of the mixture and another large leaf, and so on till the pan is full or near full. Cover with another blanched cabbage leaf or two to seal.

Cover and Bake at 300 F for 45 minutes. Let it cool for 10 or 15 minutes and turn the pan over onto a plate. It looks like a green cake. Drizzle with the tomato sauce add ground parmesan cheese. OMG Good! You can slice it like a cake in wedges and it stays together. Wow! This is my first one! Will make more!

If you want some pasta as a side dish go for it. I had this for breakfast the next morning with eggs. You could make a delicious rich Benedict sauce to it but that is adding lots of fat and calories. Maybe later…

Good Eating! Try it! Thia cake like lasagna added some fun to this dinner and my wife went crazy for it!


Medicine in the Woods

I was on my New Hampshire deer stand when all of a sudden my throat felt dry. I had to cough! Thinking the nearby deer would spook, I  often carry slices of granny smith apples to keep saliva flowing. But I didn’t carry any with me. What to do? I foraged near my stand and found some American teaberry leaves to chew. There were a few minty berries to eat as well. The mint soothed my cough and soon was back to the hunt. New Hampshire woods are full of these plants and berries. You just have to look on the forest floor.  Check out the video below.


Foraging skills can provide a wealth of plants and fungi that have significant medicinal value. I suggest this as you chase the whitetail deer. Check out NH Magazine below.

Off The Grid – Conifer Tea for Vitamin C.

https://www.offgridweb.com/survival/jacques-cartier-conifer-tea-vitamin-c/

Spruce tree needles are also a source of vitamin c. So do some wild plant homework and you will become more of a part of Nature!

If you are willing to do some research into Mushrooms and Fungi here in the Northeast US you will find a medicine chest that can aid in healing wounds such as birch bark, to cancer prevention. One such prolific mushroom is called Turkey Tail. You probably have some in your back yard.

There are many more New Hampshire mushrooms and fungi that are not only edible but highly medicinal. I have purchased a book entitled Mushrooms of the Northeastern United State for my winter reading.

Good Hunting!


Texas Trophy Deer Hunt – Hales Kitchen Back in New Hampshire

I harvested three deer, a Trophy Buck and two does just several days ago. The meat was boned (due to NHFG CWD Reg’s)  by a local Texas wild game processor and shipped via UPS and guaranteed to arrive in three days. There were 2 large boxes with insulation foam inserts that shipped with 113 lbs of unprocessed venison parts and sealed in vacuum bags with notations of parts such as hams, loins, back-straps etc.. Cost of three deer prep and ship was over $500. I could have risked a one week ground ship but the risk of loss was too great having made such a large investment in the first place. I share this with you, in case you must do this as well.

I hunted Texas because, my research found there was a high probability to see and harvest a mature 4 1/2 year old buck (on a 40 square mile “low fence” Cattle Ranch and Hunt run by Wildlife Systems, Inc.) with antlers that were fully developed. Yea Baby! My guide Pete, driving us in a 4 wheel ORV in some cases 10 to 15 miles off road around this wild cactus, juniper and mesquite like chaparral (part of the Edwards Plateau)  to a blind in the pitch black of night or on an afternoon stand… we hit the trail hard.

It was adventure! And it paid off Big Time with this 144 3/8 Boone and Crockett buck of a lifetime! And two conservation does for the freezer. I have eight grandkids and friends who love my mouth watering venison creations. 

Venison Arrived still partially frozen but thawed enough to begin processing.

My Kitchen Grinder set up with a LEM Grinder from Bass Pro.

The sanitary cutting boards, knives and sharpening stone.

I started with the larger hams by carving out major muscle groups and cutting larger muscle groups into steak and smaller muscles into tips, stew meat and for burger.

Below this meat is for venison burger using the LEM Grinder. I purchased a small amount of top round Angus beef roast with some fat to add to the burger as venison has very little.

Below are two back straps. The one I am pointing to has had the tough silver skin removed.

Below using a sharp knife this silver skin membrane is easily removed.

Let the LEM Grinder do the grinding. I used the rough (large hole) and finish (small hole) disc’s to create a nice burger. It is vital to have refrigeration was available throughout the process to keep the meat cold.

Below is half done for the burger. This container was mounded by the time I was done. I processed perhaps 35 lbs of burger. My wife and I had venison burgers for dinner. Wow! They were just delicious! OMG!

Next came the vacuum sealing in meal size portions. I date the seal-a-meal packing and note the contents. My wife and grand daughters helped to vacuum seal and freeze it. We can enjoy the Venison for the next year or two. I gave my two tween young grandsons and I a lunch of grilled back-strap and steaks with crispy browned potato medallions with some bacon fat and Olive Oil  just moment ago. They inhaled it! The meat was exceptionally flavorful with wild “hints” that identify venison. I added a 5 minute marinade, a bit of Worcester Sauce, salt and fresh cracked pepper. The texture of the meat was delightful. I got my grill up to 400º F before putting the meat on. I seared each side leaving the meat rare to medium rare.

I was gonna take a picture of the lunch but since it was hot off the grill we ate it straight away. Sorry maybe a photo at a later meal.  🙂

Today November 13th, 2018 and it is pouring cold rain outside here in New Hampshire. What a great way to warm up with grilled venison and fried potato medallions.

Good Hunting!

© 2018 All Rights Reserved


Whatya do with 35 pounds of Russian Boar Fat Trimmings? By Ed Hale

I was just amazed at the quantity and quality of fat from my very hairy Russian Boar.

Of course I have boasted about the quality of meat a bit, but here I could have just thrown that beautiful fat in the trash as a byproduct of the butchering process.

That is not me, I love to experiment! Accordingly, I read up on the rendering process and what I could do with the resultant lard. For the record, the fat does not smell much, the wet rendering process creates little odor in the kitchen that my wife was concerned about. “Wet rendering” is a hot water bath in a large pot that renders (pulls the fat as a liquid) the fat so that as the fat melts, it will not burn.

Below are 2 pots that have slowly heated water, beginning the process. Some folks, I did not think of it, will put the fat through a meat grinder which speeds up the rendering process significantly.  I turned the stove vent on low to ensure little odor.

The next best thing was to cut up the fat in the pot with scissors.

After 3 hours, the fat was somewhat liquified at a temperature of 275ºF measured with my candy thermometer.

I could tell when the water which boils at 212 F was gone because the temperature of the liquid rose slowly above 212 to the 275 mark. I was patient to heat the fat slowly over my natural gas stove so I did not burn it.

Here I am pouring the fat into wide mouth canning jars.

After cooling for several hours the fat now called Lard has solidified and off to the freezer. The lard is good enough for making fine pastry dough or for frying foods such as chicken, fish, seafood, french fries or even to make donuts or fried dough. The good fats in this lard are abundant but like everything, moderation is key.

Below is a neat article suggesting that Lard is the new health food. It is a fun read or the saturated-fat-healthy article below that.

http://www.foodandwine.com/articles/lard-the-new-health-food

http://greatist.com/health/saturated-fat-healthy

So don’t throw out that fat, render it. I now give a tiny bit to my dogs in their food. They love it. I can’t wait to fry with it too.

Here is the fat in my freezer below. I did not mention the left over fat solids are called crackle and can be used in salads etc. I have yet to use the crackle but saved some for a later use.

© 2017 All Rights Reserved